I looked and couldn’t find any documentation or videos on how to use the “Cover” tab. I especially want to know how to create and add the content for that tab.
Welcome to the community, @Yancey_Yarick! You are right that there isn’t any documentation on this relatively new feature in PTXprint. Well done for discovering it ![]() !
!
Here are some basic steps (a picture is worth 1000 words…) which will hopefully help you get started:
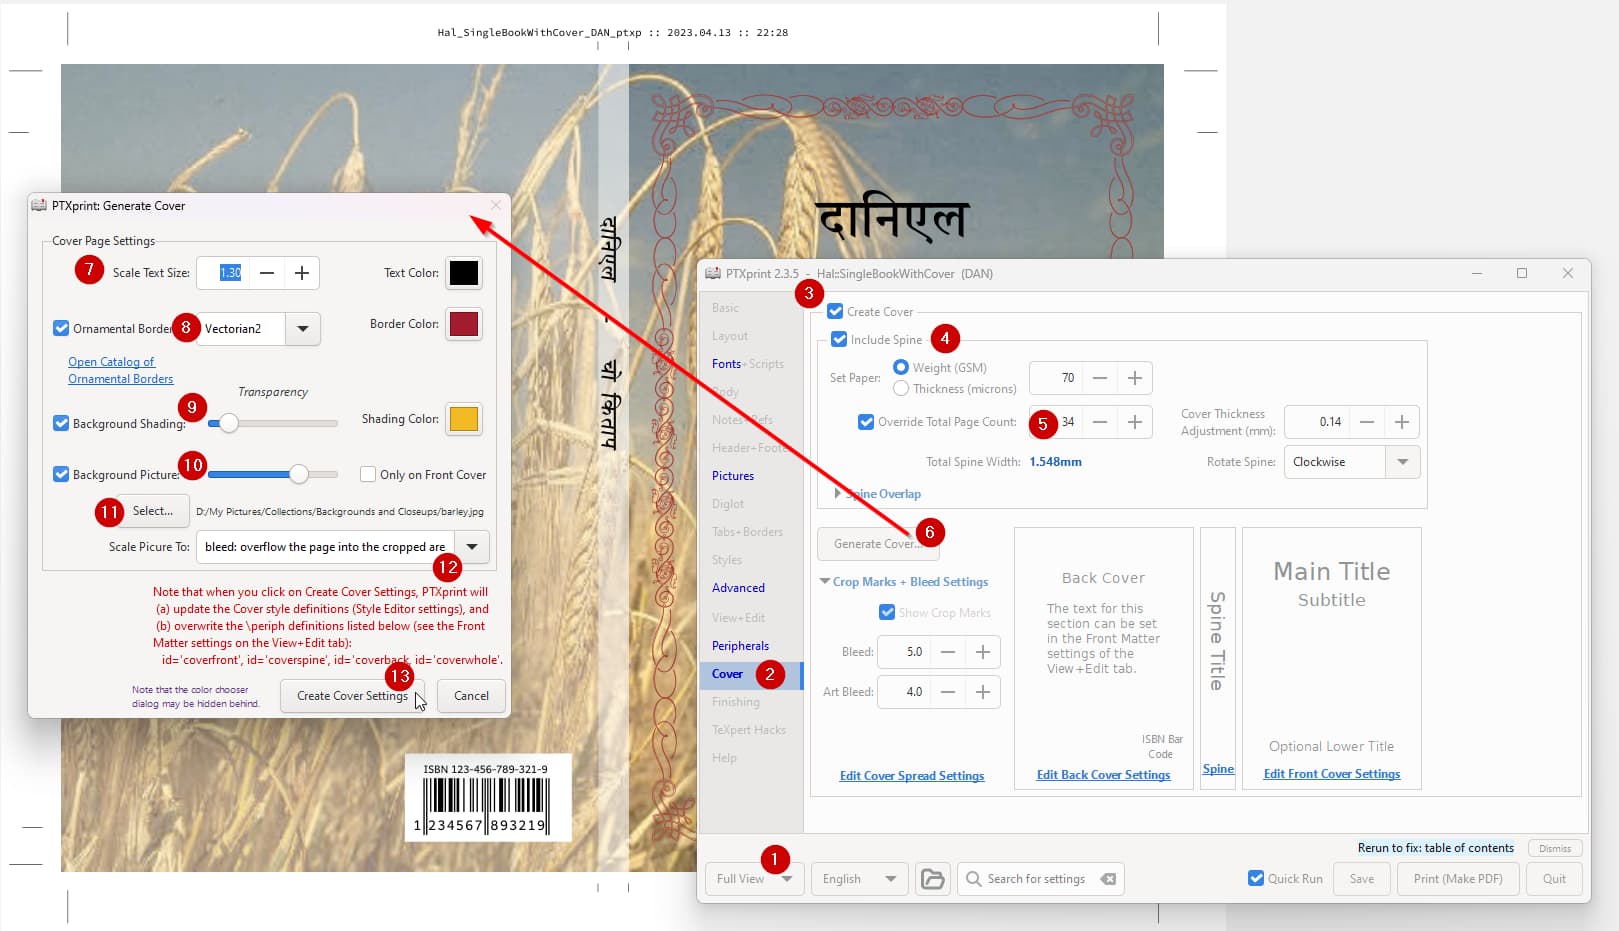
Note that when you click on Create Cover Settings, this is exactly what happens. It only sets up the parameters, ready for the next Print action (when it will make the standalone cover PDF file).
Note that if you haven’t already set up the necessary variables on the Peripheral tab, then it will prompt you to do so:
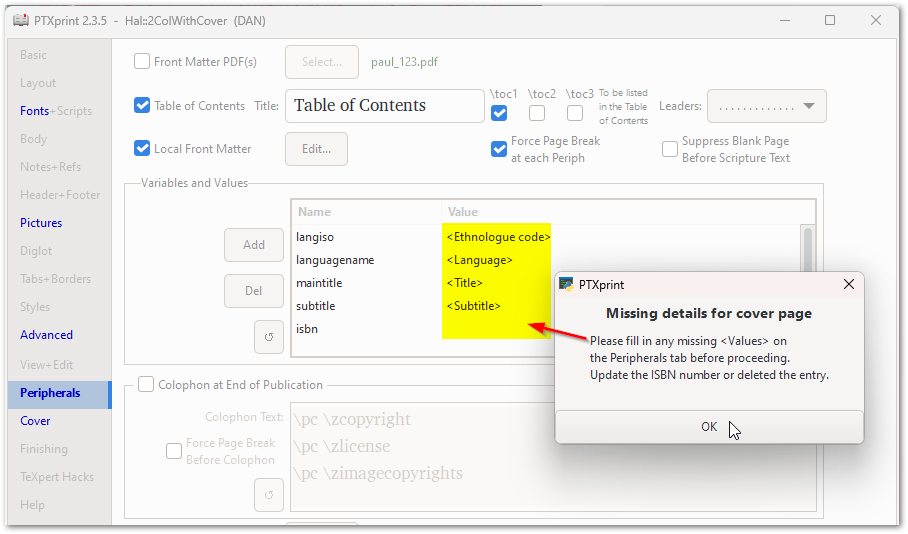
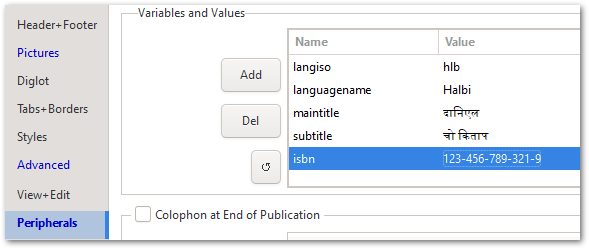
Go ahead, and click OK, and then fill in the missing values:
Note that if you leave the isbn number empty, then no barcode will be generated. But is a code is entered, then the barcode will magically appear ![]() !
!
That’s basically all there is to it. But notice that behind the scenes, it has added a bunch of code to your Front Matter file (which is where you can refine the contents and/or formatting further, and add other information if needed).
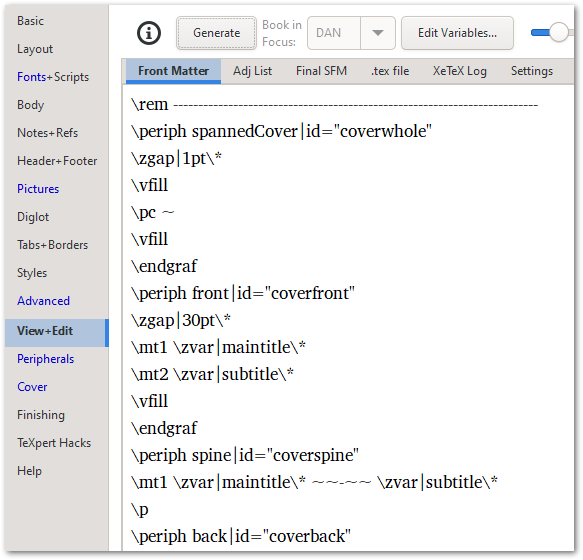
Notice that on the Cover tab, there are links at the bottom of the dialog to each of the Styles for each of the 4 different components.
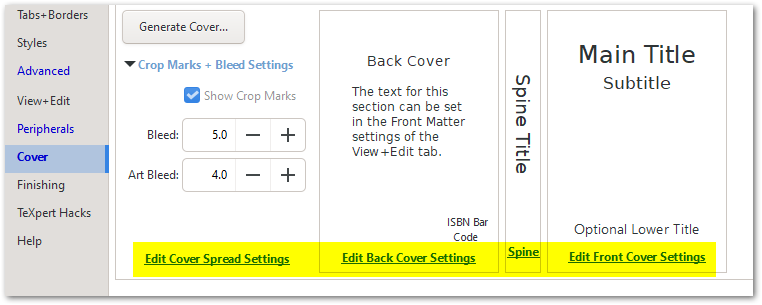
If Create Cover is enabled, then a separate PDF is always produced when you click on Print (Make PDF) This should appear in the same folder as the text content PDF. However, it will only automatically open the cover PDF for you if the Cover tab is active (otherwise the text content PDF gets opened).
Please let me know if your attempt to get covers working is successful, and if there’s anything in the brief explanation above that could do with some deeper detail.
Thanks for the quick reply and the pictures. They do help a lot. Another question I have. Is there a database of pictures and borders that can be used for creating covers?
I’m not aware of a curated public collection of scripture-suitable cover art, sorry.
There is a collection of pre-defined borders, at the end of this document.
The borders are made up from elements (shown in the catalogue, or border-fonts and graphics items can also be used) which are arranged according to a set of rules which the very adventurous can tweak / modify / replace, but so far there is no graphical user interface to help with that, you will need to type the cryptic codes into a style sheet yourself.
The documentation is probably far closer to being a comprehensive (and over-detailed) description of what the code is doing than it is to being comprehensible (blame me, I wrote it)… feel free to ask for help if you want to be brave.
Presumably you already know about the very few options which come built into PTXprint. I think they’ll be available as soon as you click the Section Heading “Select” button.
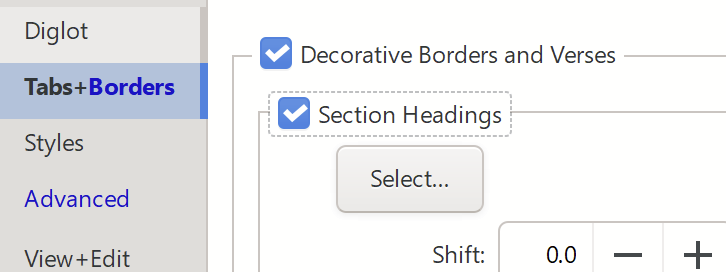
The complete list of what’s available is:

Obviously that’s not a lot of variety, but it gives you some ideas that you could use (if you know a graphic artist) to create your own.
That sort of static system is easier to use than the dynamic system David describes (look at the Ornaments Catalogue), but less powerful. If you want to create a pdf border, it takes some expertise but is a job that many, many people are highly skilled at. If you want to create “ornaments” borders, it gives you more control in shaping the border (e.g. around Scripture but not around footnotes), but at the cost of using a system that is much more specialize (David would be one of the few people able to guide you through the process, though he’s extremely kind and patient while doing it ![]() ).
).
It’s probably not at all obvious, but if the aim is a stamped border (e.g. metallic lettering on PVC/leather), then those pre-made borders could be loaded as a background image.
Probably also not obvious to new users, is that \esb “sidebars” can have other sidebars inside them, at least as far as PTXprint is concerned. The cover is already made up of multiple such nested sidebars - the front, spine and back think they are specially sized ‘full-page’ sidebars, the ‘cover-spread’ is a bigger full-page sidebar. If you have an ISBN, then that’s in a sidebar to give it a white background.
I don’t know if Word can put text boxes inside other text boxes these days, but that’s roughly what it’s doing.
Thus, if you want some artwork as background but also want to put another piece of artwork (e.g. a pre-created border image which has a transparent background) on top, then you could, of course, merge them in your favourite graphics editor, or you could make PTXprint overlay them by wrapping the coverfront \periph’s contents in \esb\cat borderart\cat* ...... \esbe
I’m not actually recommending this, as there are almost certainly going to be some challenges getting that borderart sidebar to position nicely, but it should be possible.
Putting a box around the tile, however, is very possible.
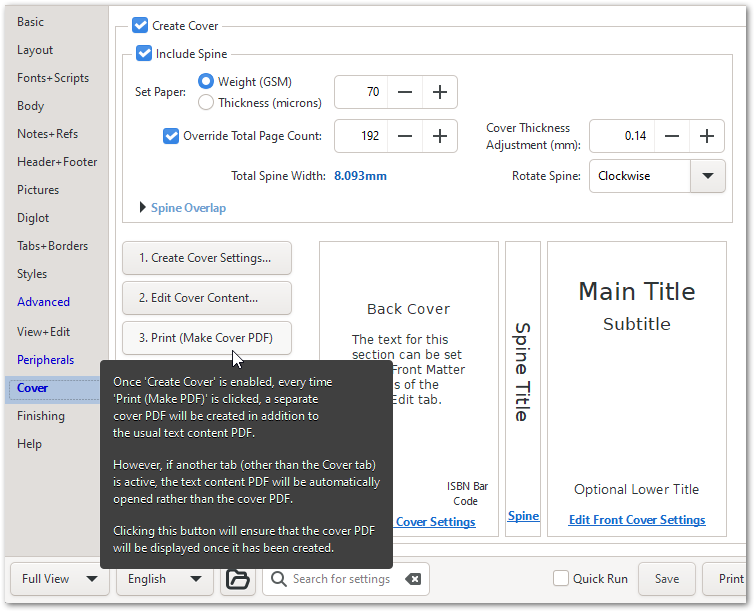
Unrelated to the immediate conversation, but related to the main topic… The Cover tab has recently been updated to make it more obvious as to what steps to take to create a cover. 1… 2… 3…
Hi…!
Greetings from Pakistan!
We are working on a project which is RtL language project. How we can have cover layout accordingly?
Hi Sajid,
If you set the correct properties on the Fonts+Scripts tab as shown here:
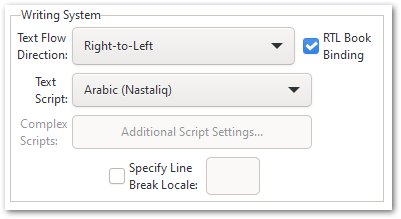
Then the cover should automatically come out as a Right-to-Left cover as seen here:
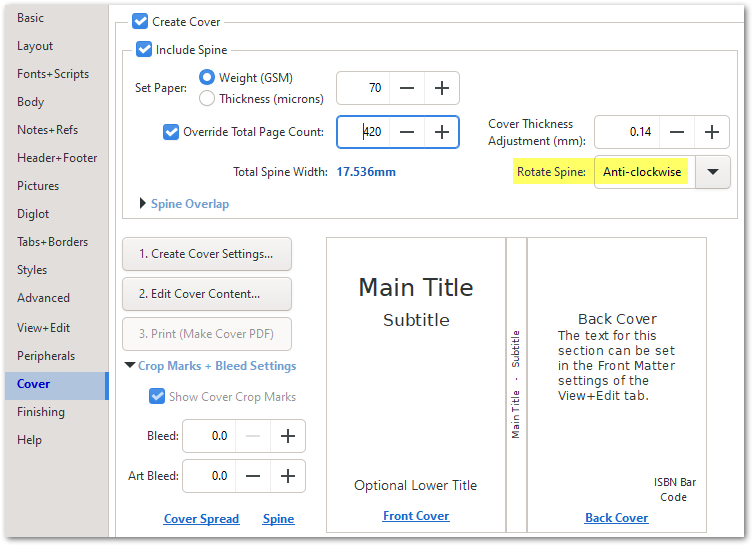
Notice that if you’re placing the book title on the spine, you may want to Rotate it Anti-Clockwise.
Thank you. It already RtL but i was confused because of English Text. It is fine now.
This actually depends… Is the national standard that spine wording be most easily readable when the book is laying on the table front-cover up (English convention) or when the book is front-cover down? It seems to me that Germany, Hungary and Romania, for instance disagree with the English-speaking convention.
I’m assuming this should be fairly straightforward, would anyone be able to give me instructions for how to have a simple picture on the cover page (not full-size or bleed or anything). Does it need to be added to the pictures tab, if so how is it linked to the cover? Or can it be dealt with via the cover tab ? (I can only see full-cover options there) Or by manually editing some code to edit the front matter? Thank you.
anyone any ideas? Thanks
Sorry, I guess I last looked on here just before you posted.
You have several options and it depends exactly what you want to do.
- The “traditional way”:
\p some text
\fig |src="where/is/my/image.jpg" scale="0.6" size="span" pgpos="hc"\fig*
\p some more text
- Via the pictures tab is usually better:
\p some text
\zfiga|someID\*
\p some more text
With the picture reference as FRT someID (don’t include spaces in someID). You almost certainly want “Before verse”, “Centered” as the postion, (a.k.a “hc” for “here, centred”), but cutouts might make sense on some covers.
-
If you want to have any text over-striking the image, or above/beside some text and inside a border and/or block of colour, then you should make the image a background or foreground image for a sidebar, and things get quite a bit more complex.
-
If by “simple image on the cover page” you actually mean that you want the picture to be most of the cover page, but inset from the edges, then set it as the background image for the
coverfrontsidebar, and reduce the image scale.
-
Some examples of what is possible are here (all images are actual screenshots!), but that file was generated before the GUI.
-
This sample image:
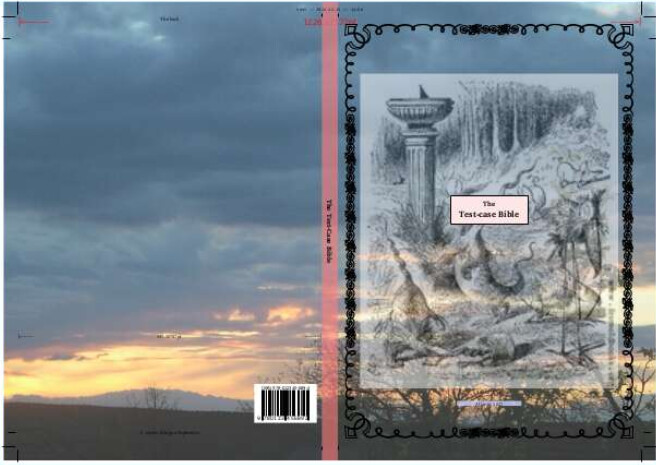
has:- Full background size image (with bleed) on
coverwhole, with no transparency - A slightly trasparent spine
- A border on
coverfront - A transparent background image on
coverfront - A barcode on the back cover.
- The
coverfrontperiphery has yet another sidebar in it, which is what puts “the test-case Bible” into that bordered box.
- Full background size image (with bleed) on
But I do wholeheartedly commend clicking on the ‘Create cover settings’ button to bring up the wizard if you’ve not done that.
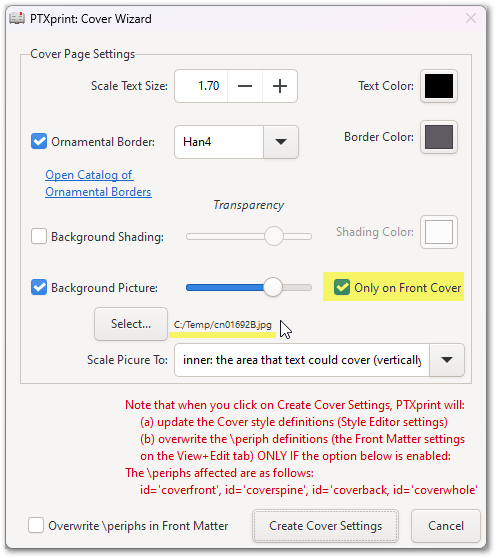
Hi @DavidW - I was hoping that the images at the top of this post were enough, but I have learned that there is a gotcha regarding the selection of an image: The path to the picture file cannot contain spaces, so you need to use a filename for the picture without any spaces, and place it in a location where none of the folders have spaces. e.g. “C:\Temp\cn01692B.jpg”. We hope to fix this bug/feature eventually, but so far the attempts have been futile.
Now for some images with some steps:
When the cover Wizard appears, fill in the details as needed, and select a picture for the front page:
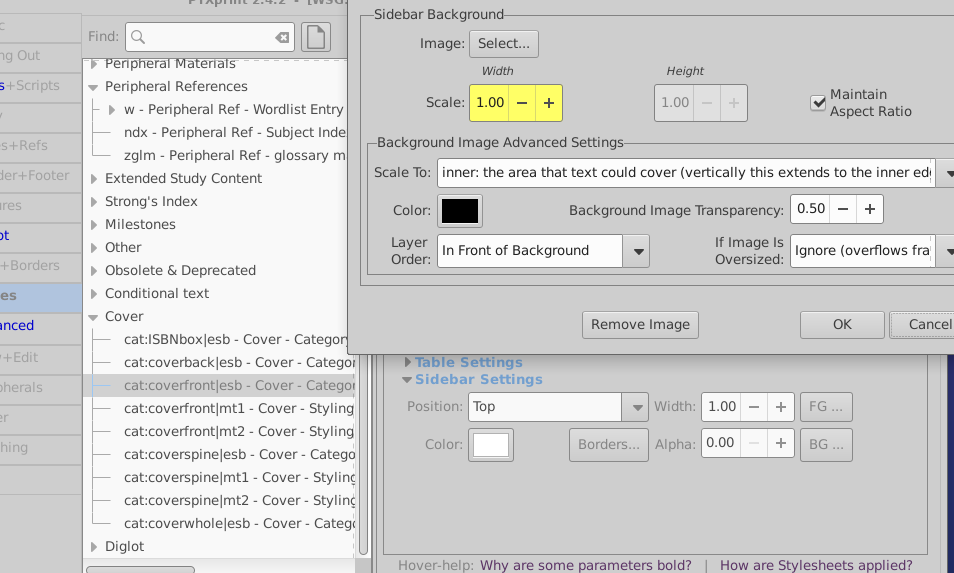
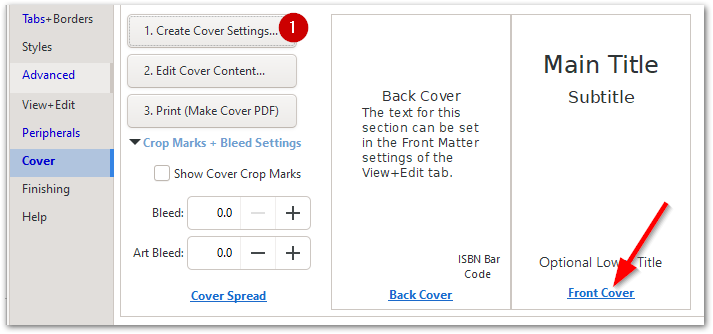
When you 1st print the Cover, you will probably find that the picture is too large, so you need to visit the Styles settings to change the size of the “Background Picture” (BG…). To find the appropriate Style for the front cover, click on the blue Front Cover hyperlink (bottom right of Cover tab – see red arrow above). This will take you right to the cat:coverfront|esb style where you can adjust the settings as needed for the Borders… and BG… picture
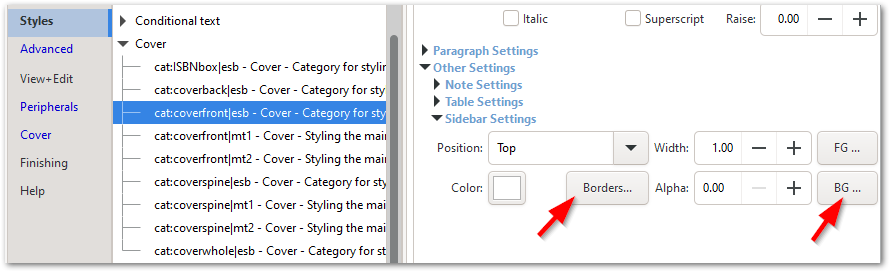
Click on BG… to edit the background Picture (yes - a bit too cryptic, I know! but the Tooltip helps)
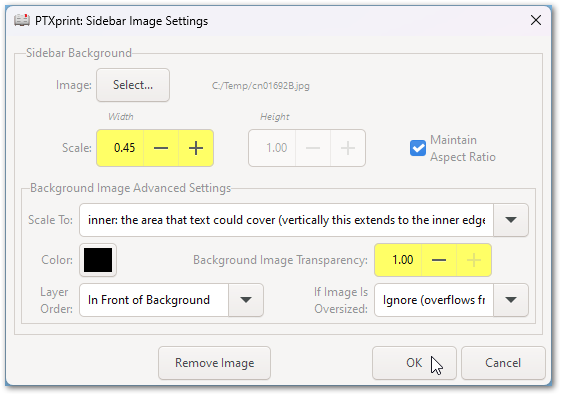
Scale the image as needed, and set the Transparency (?Alpha?) to 1.00; then click OK.
Similarly, feel free to adjust the Border… settings if needed.
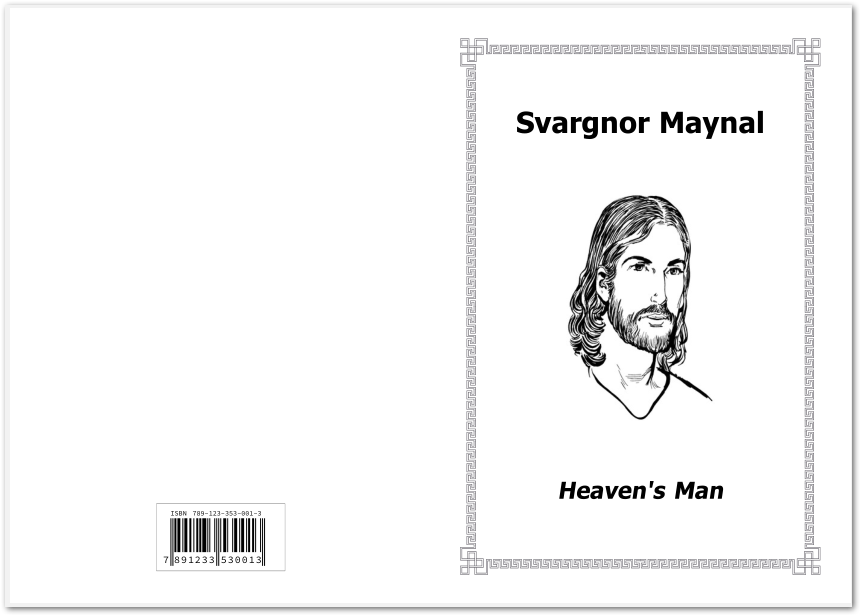
When you return to the Cover tab, and click on 3. Print (Make Cover PDF) button there, the publication cover PDF should show up looking something like this:
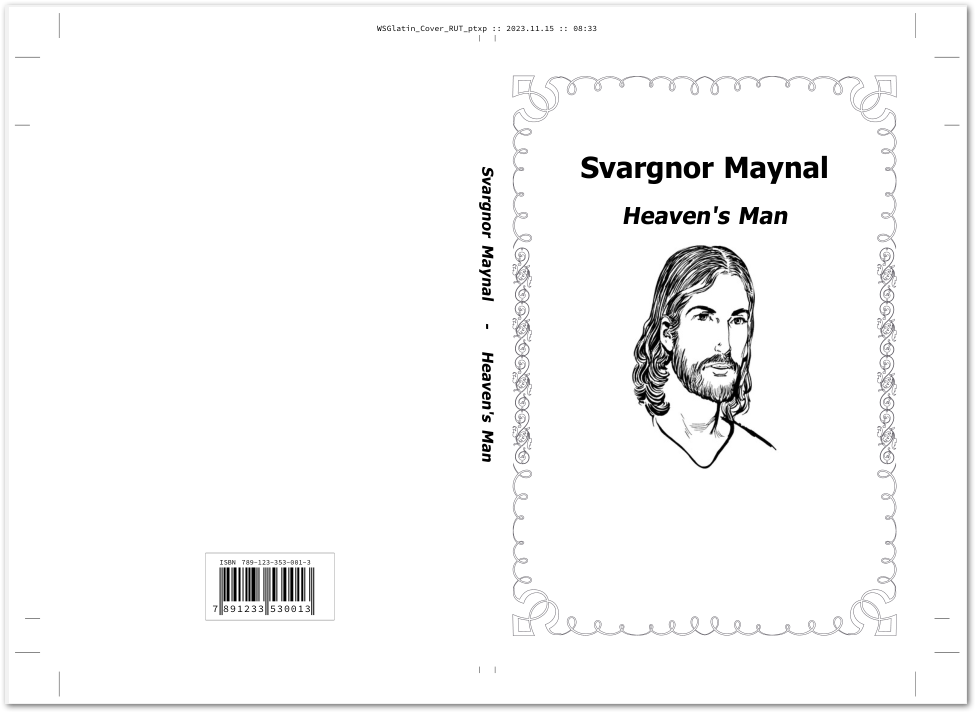
Note that you can disable the spine (uncheck Include Spine at the top of the tab) if you need a simple cover with no crop marks.
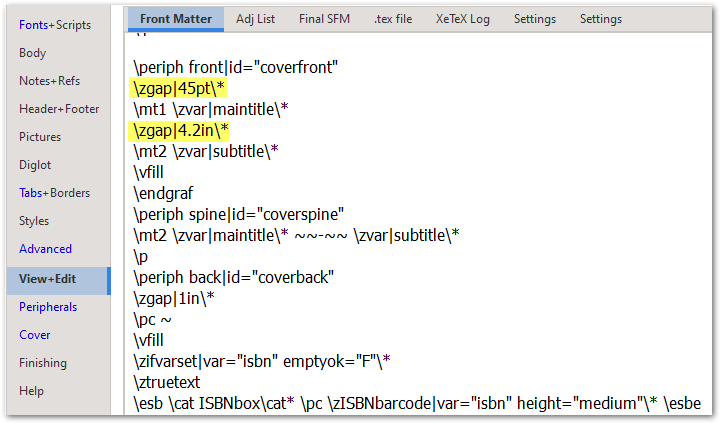
You can also use the 2. Edit Cover Content button to refine or redefine the content of the cover. For example, here, I inserted some additional space (4.2 inches) between the Main Title and Subtitle:
I also changed the width and style of the Border (back in Styles), and this was the final result:
I realize that there are many different pieces all coming together in a way that isn’t the most logical or straightforward, but be assured that everything is tweakable. Hopefully the above steps give you enough hints to create exactly what you need.
Thank you very much both of you, each of you had some helpful tips. I never would have found the BG (or FG) option if you hadn’t highlighted it Mark, and thank you very much for those alternative ways David, including the “traditional way”.